Containers
A container is a packaged unit of software that contains code and all its dependencies including, but not limited to: system tools, libraries, settings and data. This makes applications and pipelines portable and reproducible, allowing for a consistent environment that can run on multiple platforms.
Docker is widely used by researchers, however, Docker images require root privileges which means they cannot be run in an HPC environment. Apptainer (formerly Singularity) addresses this by completely containing the authority so that all privileges needed at runtime stay inside the container. This makes it ideal for the shared environment of a supercomputer.
Docker
Docker is a containerization platform that uses OS-level virtualization to package software and dependencies in deliverable units called containers. It is by far the most common containerization platform today, and most other container platforms are compatible with Docker (for example, Apptainer or Shifter).
Apptainer
Apptainer (aka Singularity) is a container solution designed to execute applications at bare-metal performance while being secure, portable and 100% reproducible. Apptainer’s permissions model makes it a popular choice for shared HPC environments where Docker cannot be supported. It has its own syntax for building containers but also support pulling and running Docker containers.
A common way to proceed is to: first, use Docker to develop new containers and run them on laptops/workstations and second, use Apptainer as a runtime on HPC systems. Existing containers that are compatible with both Docker and Apptainer platforms can be found at:
Warning
As a consequence of the above explantions, ONLY Apptainer is supported on Lucia!
Cache directory
To speed up image downloads for faster, less redundant builds and pulls, Apptainer sets a cache directory in the user home under ~/.apptainer. This directory stores images, metadata, and docker layers that can wind up being reasonably large. It is highly advised to set a new Apptainer directory using the APPTAINER_CACHEDIR environment variable pointing to a location that is:
-
unique to the user or his project coworkers. Permissions are set on the cache so that private images cached for one user are not exposed to another. This means that
APPTAINER_CACHEDIRcannot be shared. -
located on a filesystem with sufficient space for the number and size of container images anticipated
-
located on a filesystem that supports atomic rename, if possible.
On Lucia, user's project SCRATCH directory is the most suitable location.
Pulling containers
Pulling Docker containers
Apptainer has the ability to convert available docker images into sif format allowing them to be run on HPC. If a user finds an image on Docker Hub, it is possible to pull it using the command: apptainer pull <local_image_name>.sif docker://docker_image. The docker image will be downloaded from Docker Hub and converted in a sif image that will be usable on Lucia.
Example
On Docker Hub, let's pull a PyTorch docker container using Apptainer:
    user@frontal02:~ # ml containers/apptainer
    user@frontal02:~ # cd apptainer/
    user@frontal02:~/apptainer # apptainer pull pytorch_2.7.1-cuda11.8-cudnn9.sif docker://pytorch/pytorch:2.7.1-cuda11.8-cudnn9-runtime
    INFO:    Converting OCI blobs to SIF format
    INFO:    Starting build...
    Getting image source signatures
    Copying blob f557aa5ee224 done
    Copying blob 8a0c3e162a80 done
    Copying blob 01c183a1cbcd done
    Copying blob ab224c3cf399 done
    Copying blob 4f4fb700ef54 done
    Copying config a39beb6962 done
    Writing manifest to image destination
    Storing signatures
    2025/07/11 11:41:12  info unpack layer: sha256:f557aa5ee22480ee9e1af0a094ce5174a8c3d83e1aa20dc8482e4e387546e0c3
    2025/07/11 11:41:13  info unpack layer: sha256:8a0c3e162a807f339f885fe8cd62f60ea94d64745c74a483a8c1e419f360cb3e
    2025/07/11 11:41:13  info unpack layer: sha256:ab224c3cf399b42d4c9dfa9bdaa36275478cd38d2738fc03bdd45f8231e4dcf0
    2025/07/11 11:42:18  info unpack layer: sha256:4f4fb700ef54461cfa02571ae0db9a0dc1e0cdb5577484a6d75e68dc38e8acc1
    2025/07/11 11:42:18  info unpack layer: sha256:01c183a1cbcdd4616bbe68cf75ce03cfc6db58f8b1ca7174f6320834b971af68
    INFO:    Creating SIF file...
    user@frontal02:~/apptainer # ls
    pytorch_2.7.1-cuda11.8-cudnn9.sif
    user@frontal02:~/apptainer #
Pulling Nvidia Images
Building GPU-optimized containers for Artificial intelligence (AI) and Machine Learning (ML) workflows, tuned specifically for the most demanding deep learning applications, is not a trivial task. To solve this issue, NVIDIA has come up with a catalog of specialized containers called NGC Collections. The NGC catalog covers a wide variety of use cases and application scenarios: it features both popular deep learning frameworks and High-performance Computing libraries and toolkits that also leverage the accelerated computing of GPU clusters.
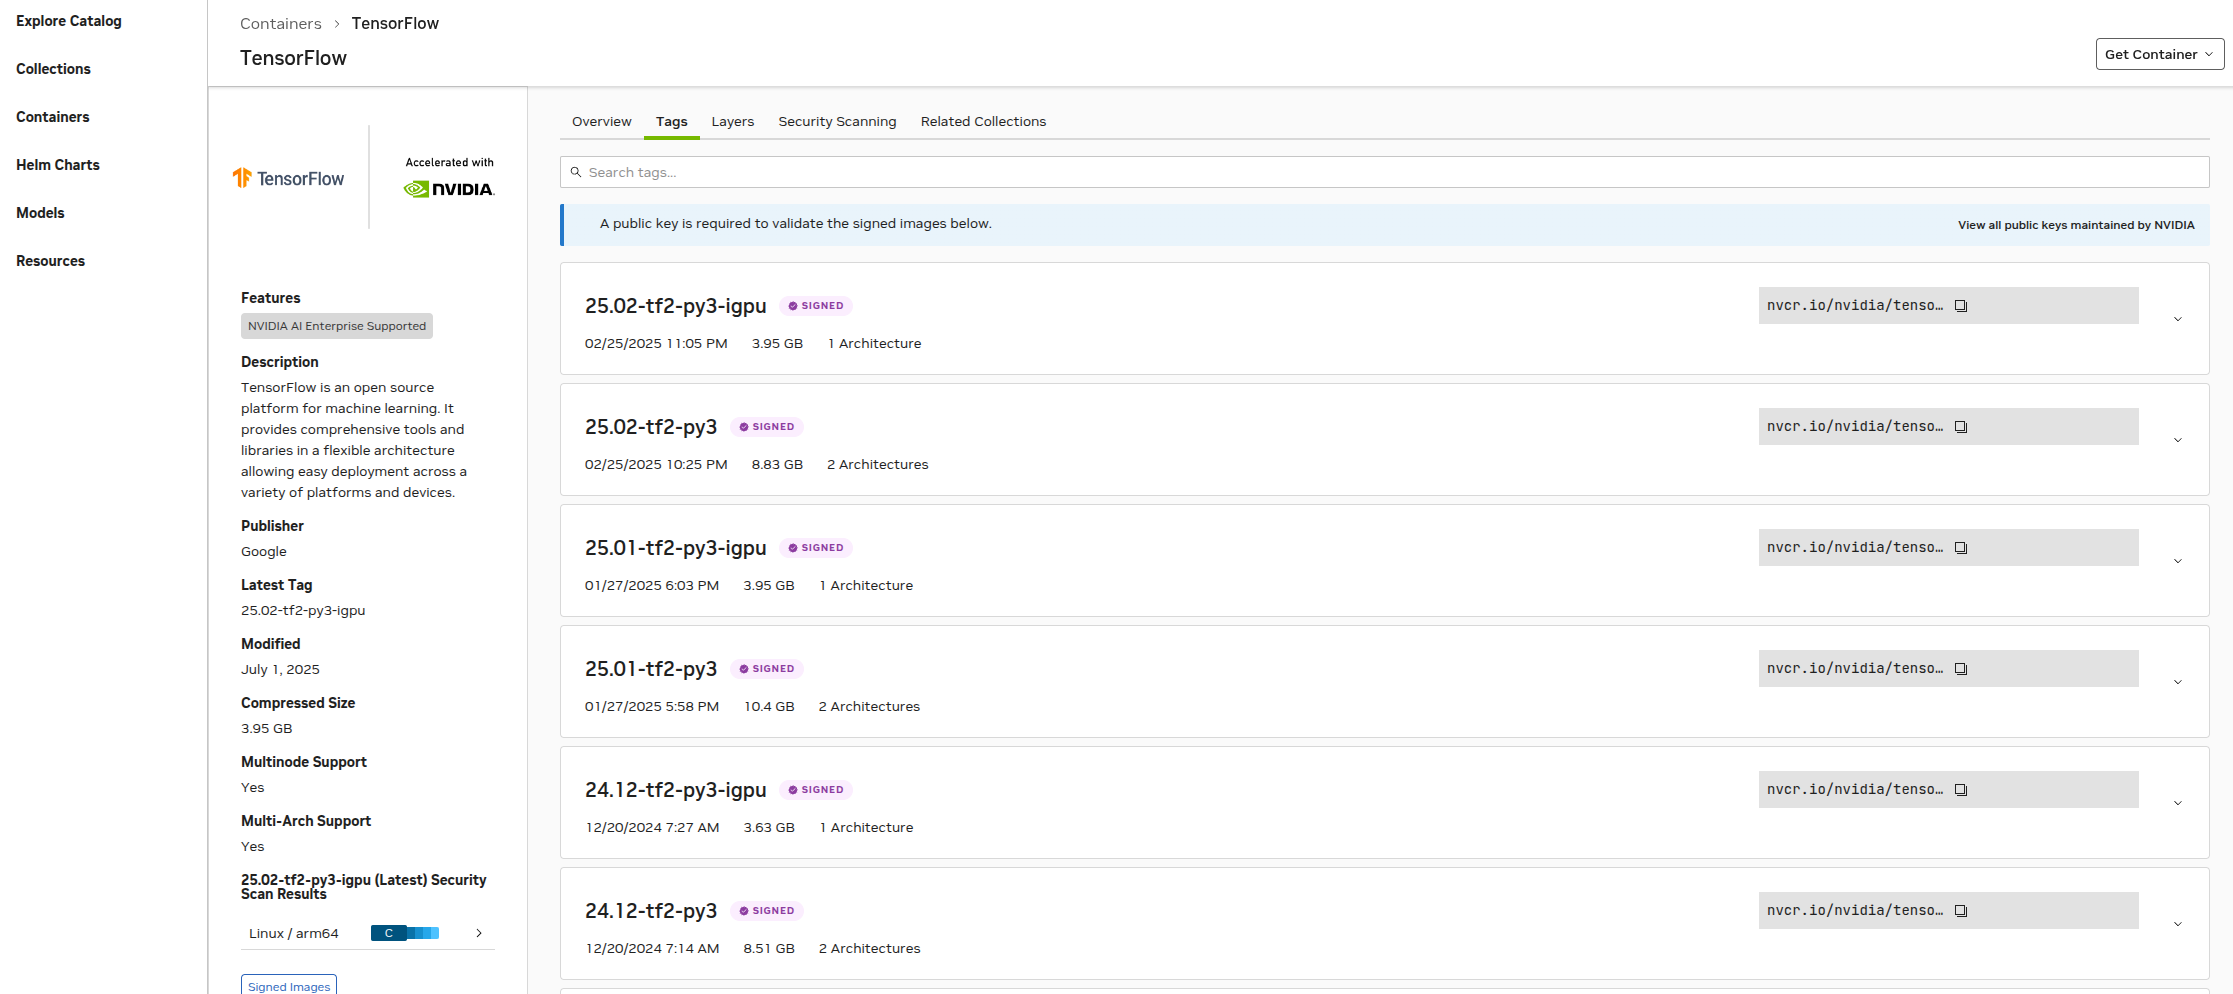
Once logged on the NVidia NGC catalog, it is possible to navigate through all available softwares or use the embedded search engine to find a specific package. All available versions of the selected software can be found in the Tags tab.
For example, in order to pull the latest TensorFlow container available, copying the greyed zone nvcr.io/nvidia... to clipboard allows to get the pull statement for the latest tag of TensorFlow 2:
To pull and convert this NGC image to a local Apptainer image file:
    user@frontal02:~/apptainer # apptainer pull tensorflow-25.02-py3.sif docker://nvcr.io/nvidia/tensorflow:25.02-tf2-py3
    INFO:    Converting OCI blobs to SIF format
    INFO:    Starting build...
    Getting image source signatures
    Copying blob ec7790dc104b [============>-------------------------] 1.5GiB / 4.6GiB
    Copying blob ec7790dc104b [============>-------------------------] 1.6GiB / 4.6GiB
    ...
    [Skipped]
    ...
    INFO:    Creating SIF file...
    user@frontal02:~/apptainer #
The general format for any pull is:
apptainer pull <local_image_name> docker://nvcr.io/<registry>/<app:tag>
This Apptainer build command will download the app:tag NGC Docker image, convert it to Apptainer format and save it to the local filename <local_image_name>.
Using containers
Apptainer can be used to run analyses and applications in various ways: running a prepackaged workflow embedded in the image with apptainer run, executing commands within the container's environment using apptainer exec or starting an interactive instance to work directly within the container using apptainer shell.
Running prepackaged Apptainer workflows
apptainer run is used without any arguments and executes a predefined workflow embedded in the image. The general syntax is:
apptainer run image.sif
For example:
    user@frontal01:~/apptainer # apptainer run lolcow.sif
    _______________________________
    < Tue Jul 15 11:56:06 CEST 2025 >
    -------------------------------
            \   ^__^
             \  (oo)\_______
                (__)\       )\/\
                    ||----w |
                    ||     ||
    user@frontal01:~/apptainer #
Executing commands within Apptainer images
apptainer exec allows to execute commands within an Apptainer image without entering it interactively. It simplifies running tasks by providing a command-line interface to interact with containerized applications, ensuring consistency and reproducibility in any workflow. The general syntax is:
apptainer exec image.sif <commands>
For example, using Tensorflow:
apptainer exec ~/apptainer/tensorflow-25.02-py3.sif python3 myscript.py
Using Apptainer applications interactively
Apptainer shell starts an interactive session within the container's environment. This is optimal for testing, debugging or using any sort of graphical interface installed in the image. The general syntax is:
apptainer shell image.sif
For example:
    user@frontal01:~ # apptainer shell ~/apptainer/tensorflow-25.02-py3.sif
    Apptainer> python3
    Python 3.12.3 (main, Jan 17 2025, 18:03:48) [GCC 13.3.0] on linux
    Type "help", "copyright", "credits" or "license" for more information.
    >>> import tensorflow as tf
    >>> tf.__version__
    '2.17.0'
    >>>
Warning
When using Apptainer to execute workflows that require a GPU, the additional flag --nv must be added to the Apptainer command. The general syntax for GPU usage is:
apptainer {run/exec/shell} --nv image.sif <commands>
Creating Apptainer containers
In this section, an Apptainer container for the famous PAPI software will be created on the user's laptop/workstation and tested later on Lucia. PAPI provides the tool designer and application engineer with a consistent interface and methodology for use of the performance counter hardware found in most major microprocessors. PAPI enables software engineers to see, in near real time, the relation between software performance and processor events. In addition Component PAPI provides access to a collection of components that expose performance measurement opportunites across the hardware and software stack. PAPI is easily installed using a configure/make/make install procedure.
Sandbox mode
One way to create an Apptainer container is in the so-called sandbox mode. Instead of an image file, a directory structure representing the file system of the container is created.
-
The first step is to create a basic container from a very bare-bones definition file. An arbitrary choice is made here: creation of an Ubuntu 20.04 container image for PAPI. The basic definition file - called
papi-ubuntu.def- is as simple as:Hint
For full description of a definition file, see Apptainer definition files
-
Using this definition file, build the container
Note that instead of an image file, a directory called
papihas been created. If some reference files etc... have to be included, they can be copied to the correct subdirectory. -
A shell can be now opened in the container. The container file system needs to be writable, so the Apptainer option
--writableis required. The--fakerootoption is also needed: -
The command prompt should now be
Apptainer>. This means that all coming work will be done inside the container itself.💡 The base container images are typically very bare-bones and do not contain any compilers, download tools etc..., so those need to be installed.
💡 In the case of PAPI, GNU compilers as well as
makeandwget(to download the source file) have to be installed.So, within the container shell, the recipe for PAPI installation has to be reproduced.
-
Now that the necessary tools are available in the container shell, it is possible to proceed to the installation of PAPI.
Apptainer> wget https://icl.utk.edu/projects/papi/downloads/papi-7.1.0.tar.gz ... [Skipped] ... Apptainer> tar xf papi-7.1.0.tar.gz ... [Skipped] ... Apptainer> cd papi-7.1.0/src/ Apptainer> ./configure --prefix=/path/to/papi/PAPI ... [Skipped] ... Apptainer> make ... [Skipped] ... Apptainer> make install ... [Skipped] ... Apptainer> /path/to/papi/PAPI/bin/papi_version PAPI Version: 7.1.0.0 Apptainer> -
Now that PAPI is installed within the container, it is possible to clean up the source file and the installation directory and exit the sandbox:
-
The production image can now be built from the sandbox:
-
Check the Apptainer image:
Definition file
The above method is fine if the container is intended to be only used by the user himself and/or his close collaborators. However, if the goal is to distribute it wider, it’s best to write a definition file for it so that way other users can see what is in the container, and they can easily rebuild the production image.
To write a definition file, it is advised to start from the original bare-bones file and add various sections as required:
-
the installation commands go in the
%postsection -
if environment variables are required, they will be placed in the
%environmentsection -
if additional files are needed, they go into the
%filessection -
if a runscript is necessary for the container to work properly, it goes in the
%runscript.
Hint
There are also other sections available if needed. More information can be found in the Definition Files chapter of the Apptainer documentation.
For the basic PAPI case, the definition file papi.def writes as follows:
     Bootstrap: docker
     From: ubuntu:20.04
%post
apt update
apt install wget -y
apt install gcc -y
apt install make -y
wget https://icl.utk.edu/projects/papi/downloads/papi-7.1.0.tar.gz
tar xf papi-7.1.0.tar.gz
cd papi-7.1.0/src/
./configure --prefix=/path/to/papi/PAPI
make
make install
cd ../..
rm -rf papi-7.1.0 papi-7.1.0.tar.gz
apptainer build --fakeroot papi.sif papi.def
Documentation
All information about Apptainer can be found in the Apptainer User Guide.