Portal
The HPC Portal, powered by the Open OnDemand (OOD) solution, simplifies access to HPC resources for researchers, engineers, and scientists, allowing them to focus on computational tasks without navigating complex system commands.
Access
For first time users.
Before accessing the HPC Portal, you must log in to LUCIA via SSH at least once. This initial connection will prompt you to change your password and automatically create your home directory (which is required before being able to log on the Open OnDemand portal).
To access the HPC Portal, open your browser and go to the following URL: https://hpcportal.lucia.cenaero.be
You will be prompted to enter your username and password (the same credentials are used for SSH access).
Upon logging in, you’ll be greeted with the HPC Portal's main page, where two types of applications are available:
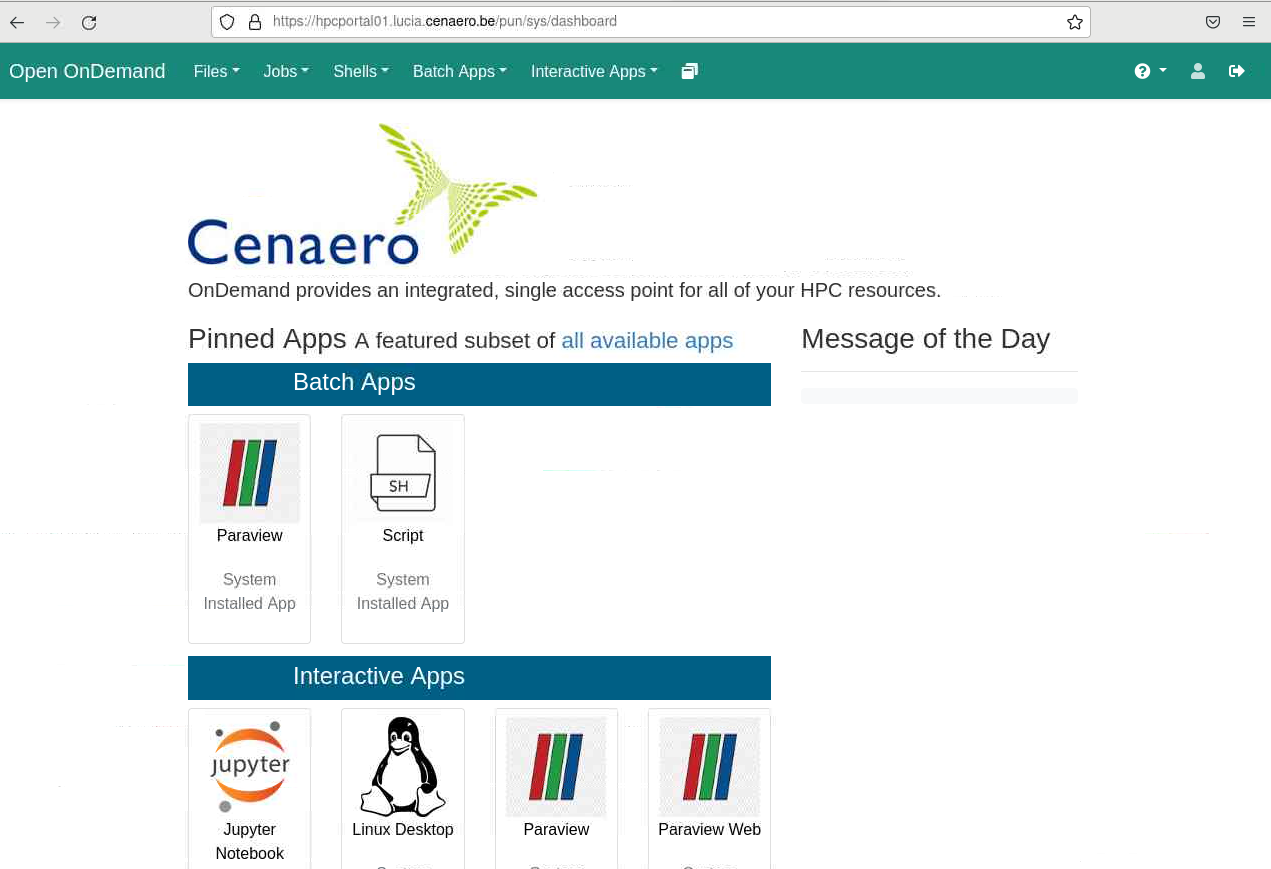
- Batch Apps: Designed for tasks that don’t require user interaction once started, batch apps are used for submitting jobs through the batch scheduler. When a batch job is submitted, the scheduler allocates the required resources and runs the job autonomously from start to finish. This type of application is ideal for large-scale or repetitive computations and simulations that execute predefined commands or scripts.
- Interactive Apps: Intended for tasks that require real-time input and active user involvement, interactive apps allow users to engage with the application as it runs. The job scheduler still manages resource allocation, but unlike batch jobs, interactive apps create a live environment where you can adjust settings, explore data, or debug code dynamically. Examples include Jupyter Notebooks, RStudio, and MATLAB, which offer graphical interfaces and flexibility, making them suitable for iterative, exploratory workflows.
Applications
The following applications are available on the OpenOnDemand HPC portal:
Each application has certain general parameters that need to be either automatically filled or manually specified. Below is a description of the fields you will encounter:
Common Parameters
By correctly filling in these parameters, you can optimize your job submission and ensure that it runs efficiently within the available resources.
-
Job Name This field allows you to assign a name to your job. You may choose any name for identification purposes. The name you choose does not affect the execution of the job.
-
Partition You must select a partition from the dropdown menu. A partition represents a set of resources allocated for specific types of workloads.
-
Project (Slurm Account) Specify the project under which the job will be billed. This corresponds to the Slurm account that will be used to finance the job submission.
-
Walltime Specify the maximum duration your job can run. Setting a walltime that is too short may result in your job being prematurely terminated by the SLURM batch scheduler. Conversely, setting a walltime that is too long may negatively impact job scheduling, especially when the queue is congested. Jobs with shorter runtimes may be prioritized over those with longer runtimes.
-
Nodes This field allows you to specify whether your job requires parallel execution across multiple nodes. Indicate the number of nodes needed for your application. Keep in mind that requesting too many nodes, especially during peak usage periods, could make your job submission less likely to be scheduled.
-
Cores per Node This option allows you to specify the number of cores to allocate on each node, leaving the remaining cores available for other jobs. It is particularly useful when combined with the Memory per Core option, especially if your application requires a large amount of memory per core. By reducing the number of cores allocated per node, you can allocate more memory per core. For example, on the batch partition, you may allocate 128 cores per node, but this configuration may limit you to only 1 GB of memory per core. By allocating fewer cores per node, you can increase the memory available to each core, optimizing memory usage for applications that are memory-intensive.
-
Memory per Core Specify the amount of memory required per core. Be cautious when setting this value:
- Setting a memory value that is too low may cause your job to be terminated by the SLURM batch scheduler if the requested resources exceed the allowed limits.
- Setting a memory value that is too high could lead to the allocation of more resources than necessary, resulting in potential overcharges and inefficient use of resources.
The Batch service submits a generic batch job in Slurm. The user must specify an input script and any associated arguments via the Script Specific Parameters field in the submission form.
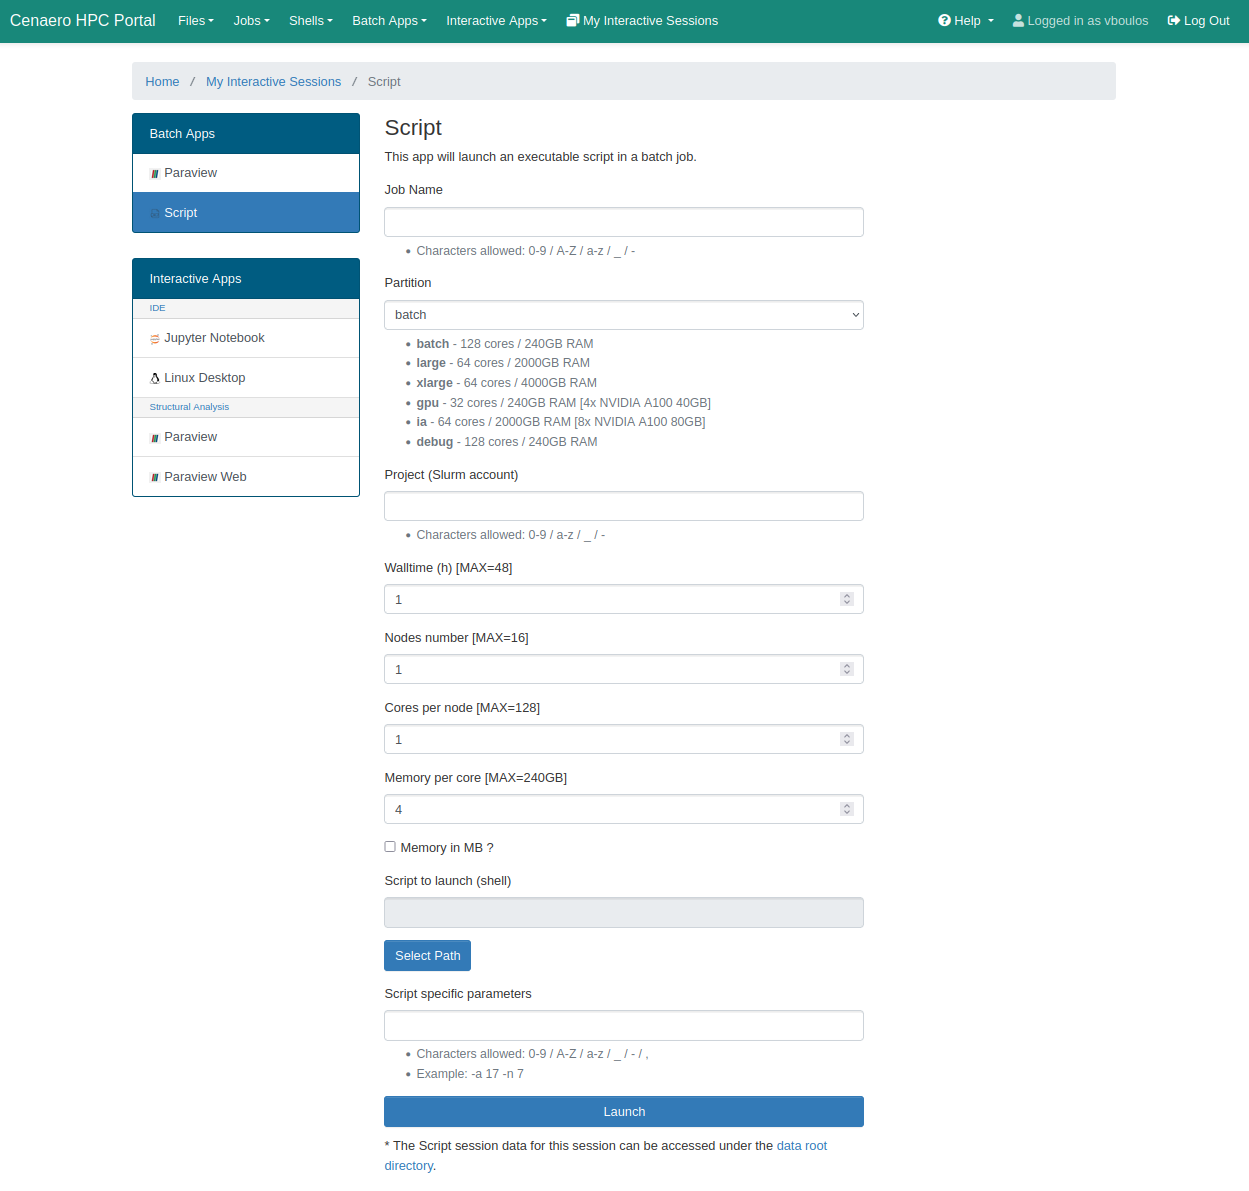
Click the Launch button at the bottom of the page to submit your batch job.
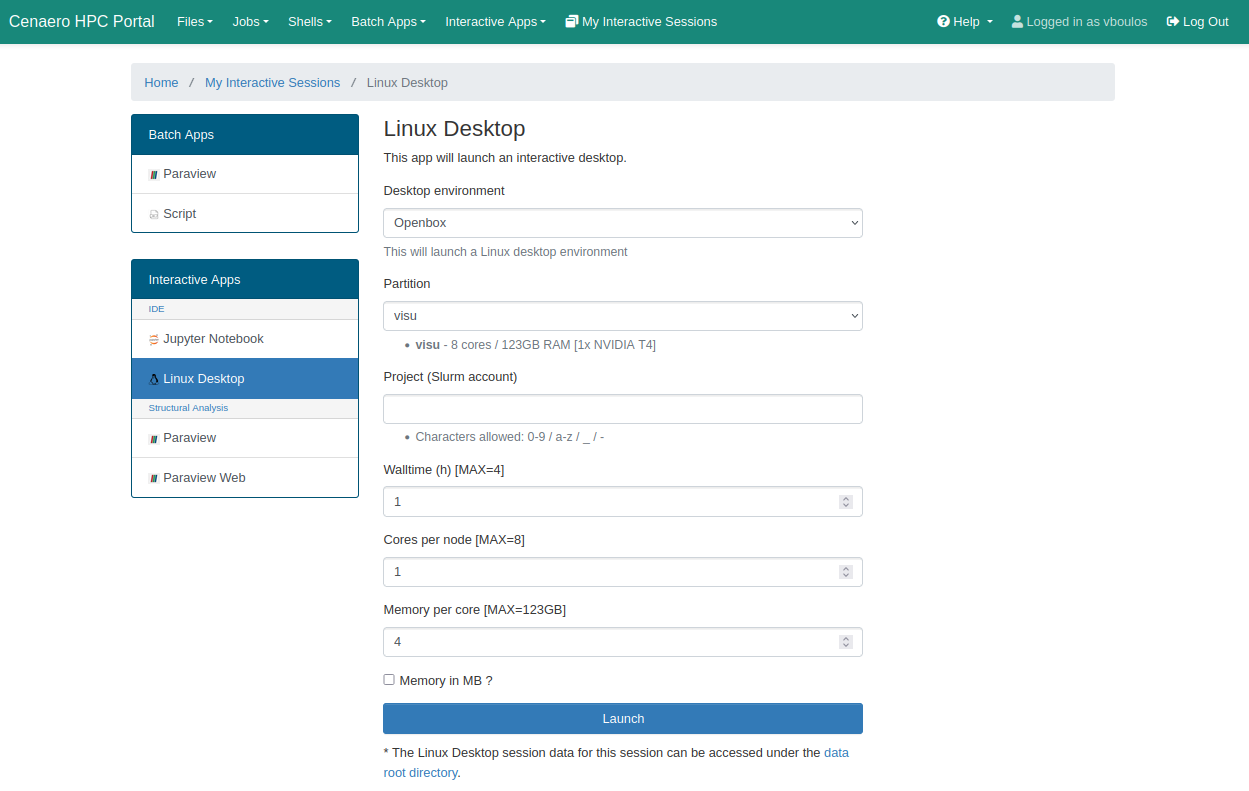
The Linux Desktop service allows users to start a complete Linux desktop environment, choosing between Openbox, XFCE, or KDE. This service consumes resources on the "visu" partition, which is equipped with NVidia graphics cards to enable hardware-accelerated 3D rendering.
Choose your working environment, then click on the Launch button at the bottom of the page to submit a ressource allocation request.
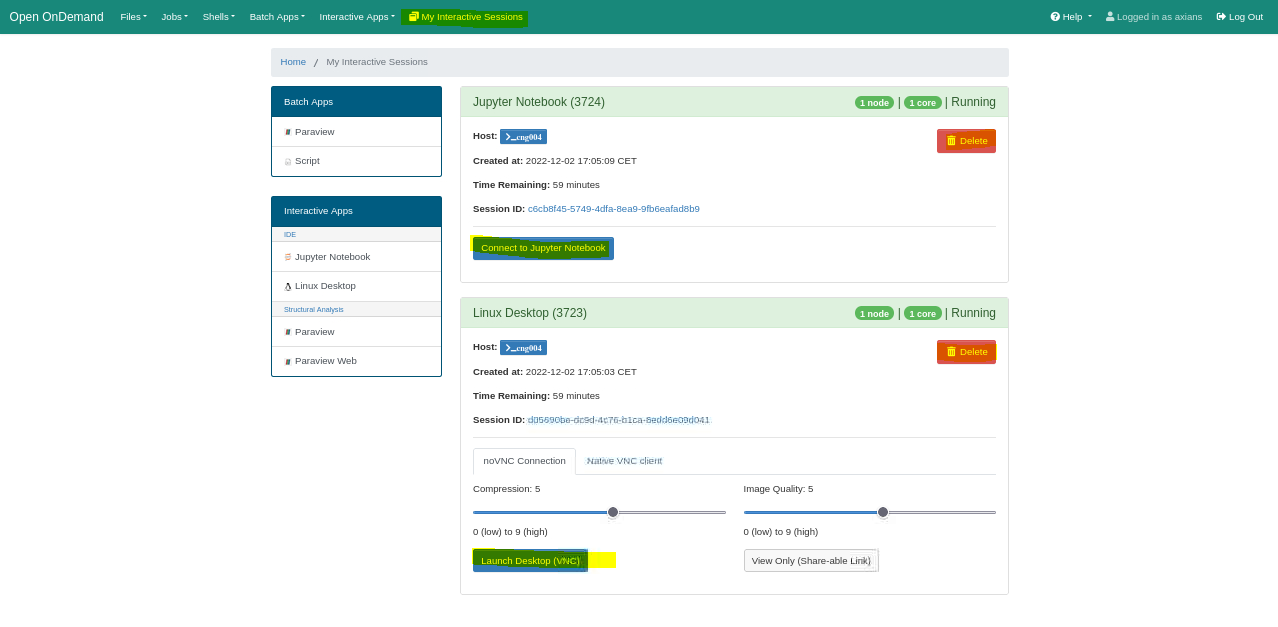
The window will refresh, and if everything is successful, the message Session was successfully created will soon confirm that the session was created. At the bottom, click the Launch Desktop (VNC) button to open the remote desktop session in a new browser tab.
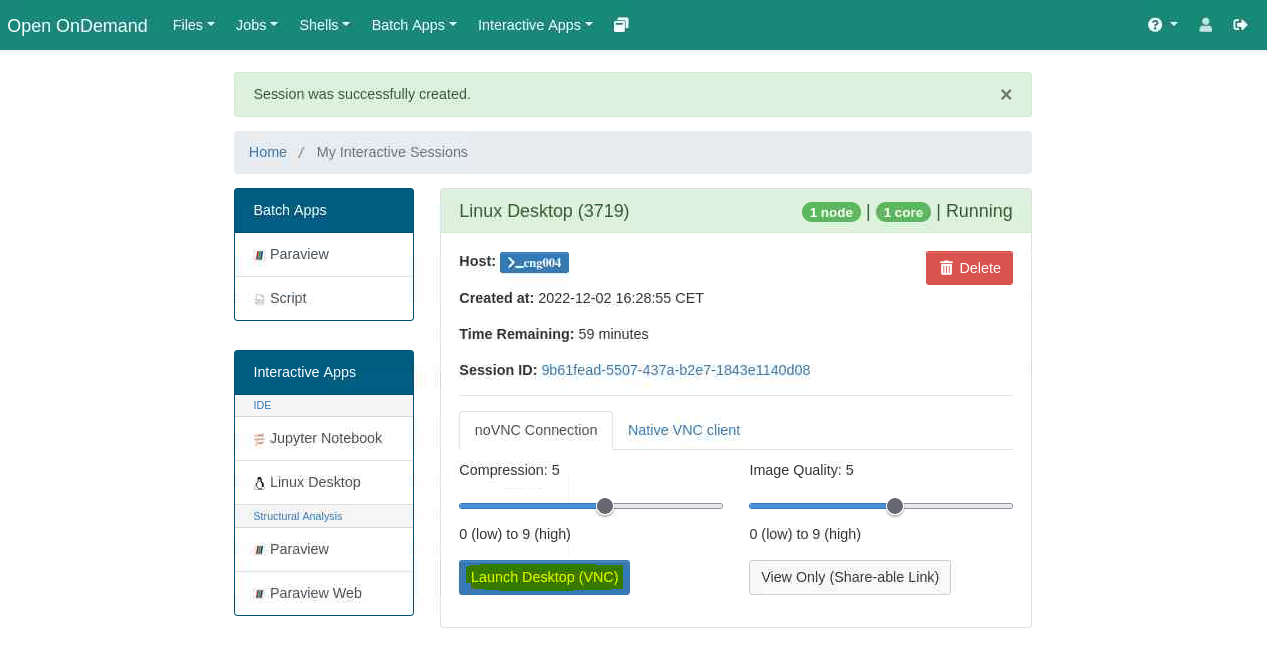
Don't forget to release the allocated resources when you are done.
Click the red Delete button to end the session and free up the allocated resources.
Jupyter Notebook is an interactive tool that allows you to write and run code, instantly seeing the results, making it ideal for exploratory work. It supports languages like Python, R, and Julia, and is commonly used for data analysis, scientific computing, machine learning, and documentation.
Select the desired Python environment (Python-3, Anaconda3, TensorFlow22) and fill in the other required fields. Then, click the Launch button at the bottom of the page to submit your resource allocation request.
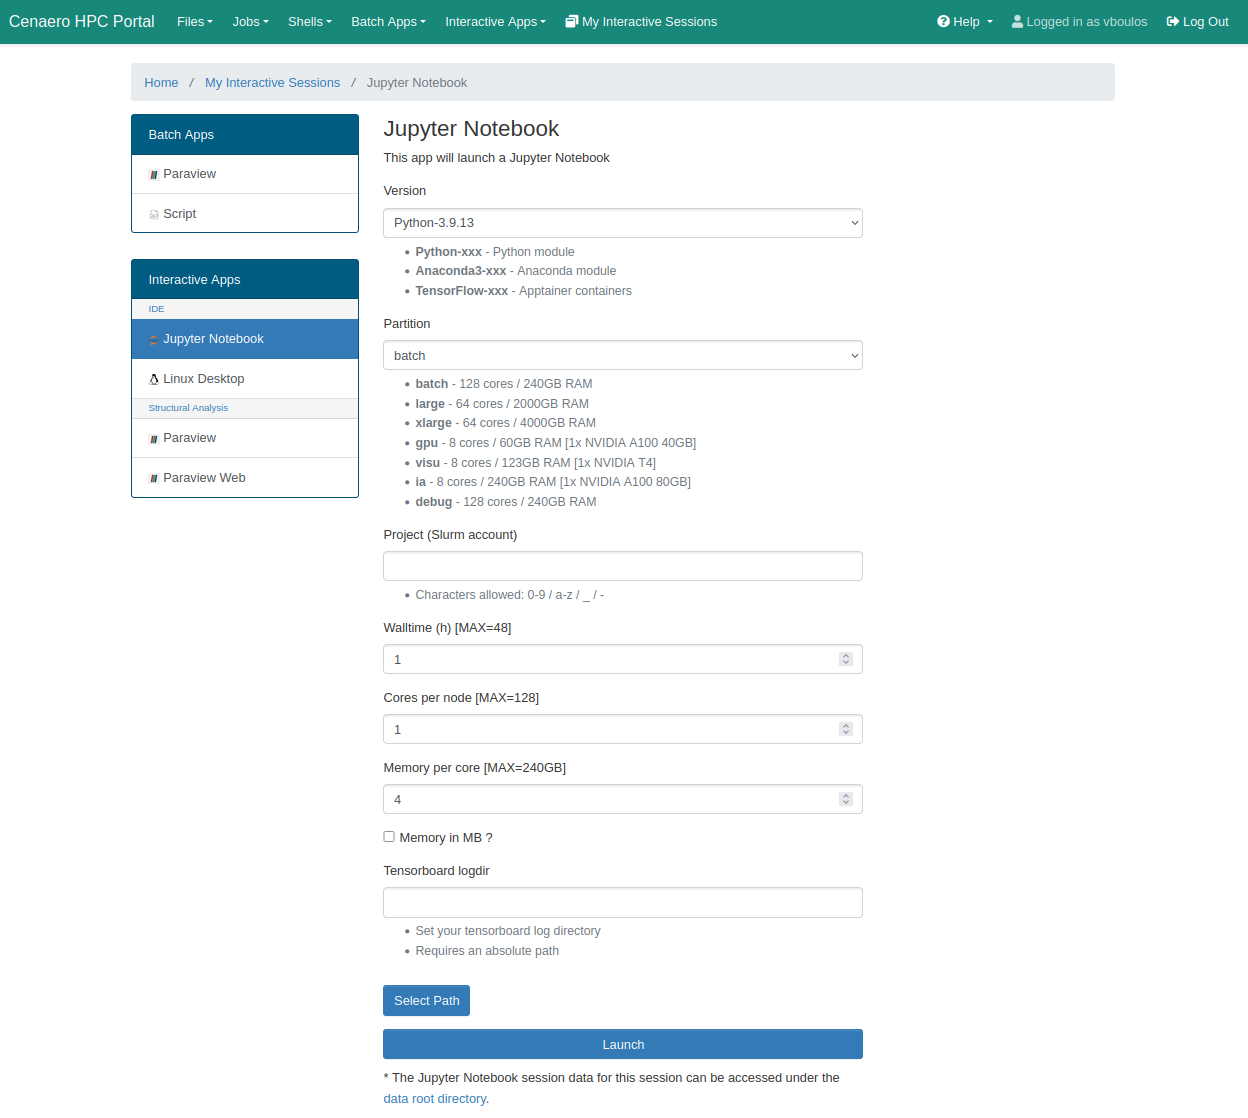
The window will refresh, and if everything is successful, the message Session was successfully created will soon confirm that the session was created.
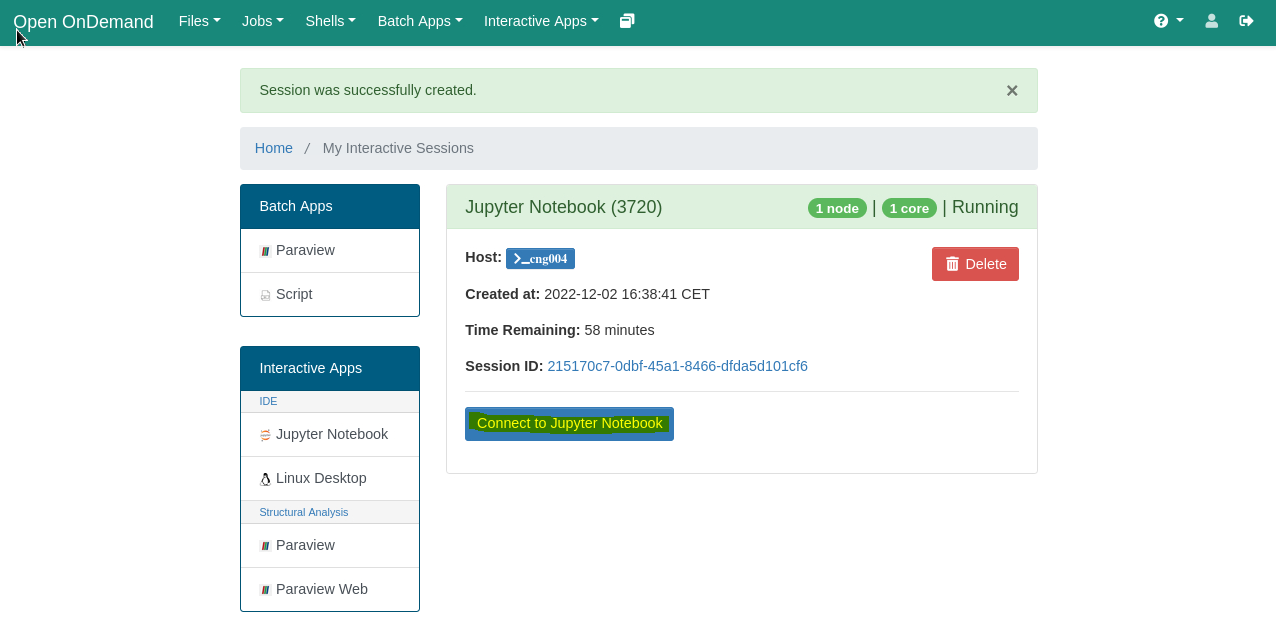
At the bottom, click the Connect to Jupyter Notebook button to open the remote desktop session in a new browser tab.
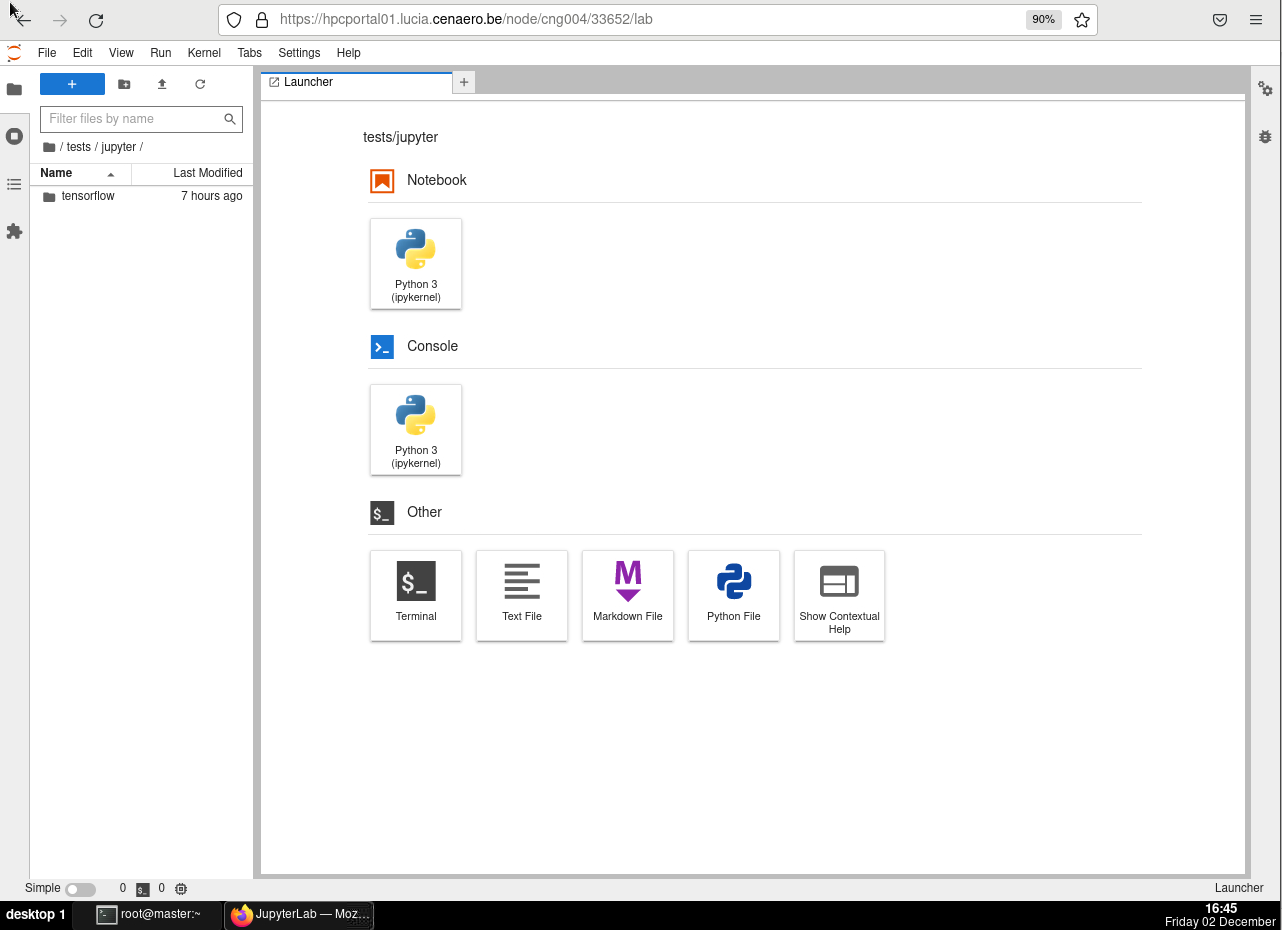
Don't forget to release the allocated resources when you are done.
Click the red Delete button to end the session and free up the allocated resources.
ParaView is an open-source tool for visualizing complex scientific data in 2D, 3D, or animations. It supports datasets such as grids, point clouds, volumetric data, and time-series making it ideal for fields like physics, engineering, and biology.
It offers both a graphical user interface (GUI) and a powerful scripting interface.
ParaView also offers ParaViewWeb, a web-based version that provides remote access to its powerful 3D data visualization capabilities without requiring a local installation.
Paraview in Batch mode
This mode allows users to submit a batch job in Slurm, specifying an input file to be executed with ParaView's pvbatch command. Users can also enter script arguments in the Script Specific Parameters field on the submission form.
Currently, ParaView batch jobs run on the batch partition, which consists of compute nodes without 3D accelerator cards. As a result, a Mesa version of ParaView is used, relying on software rendering for OpenGL processes.
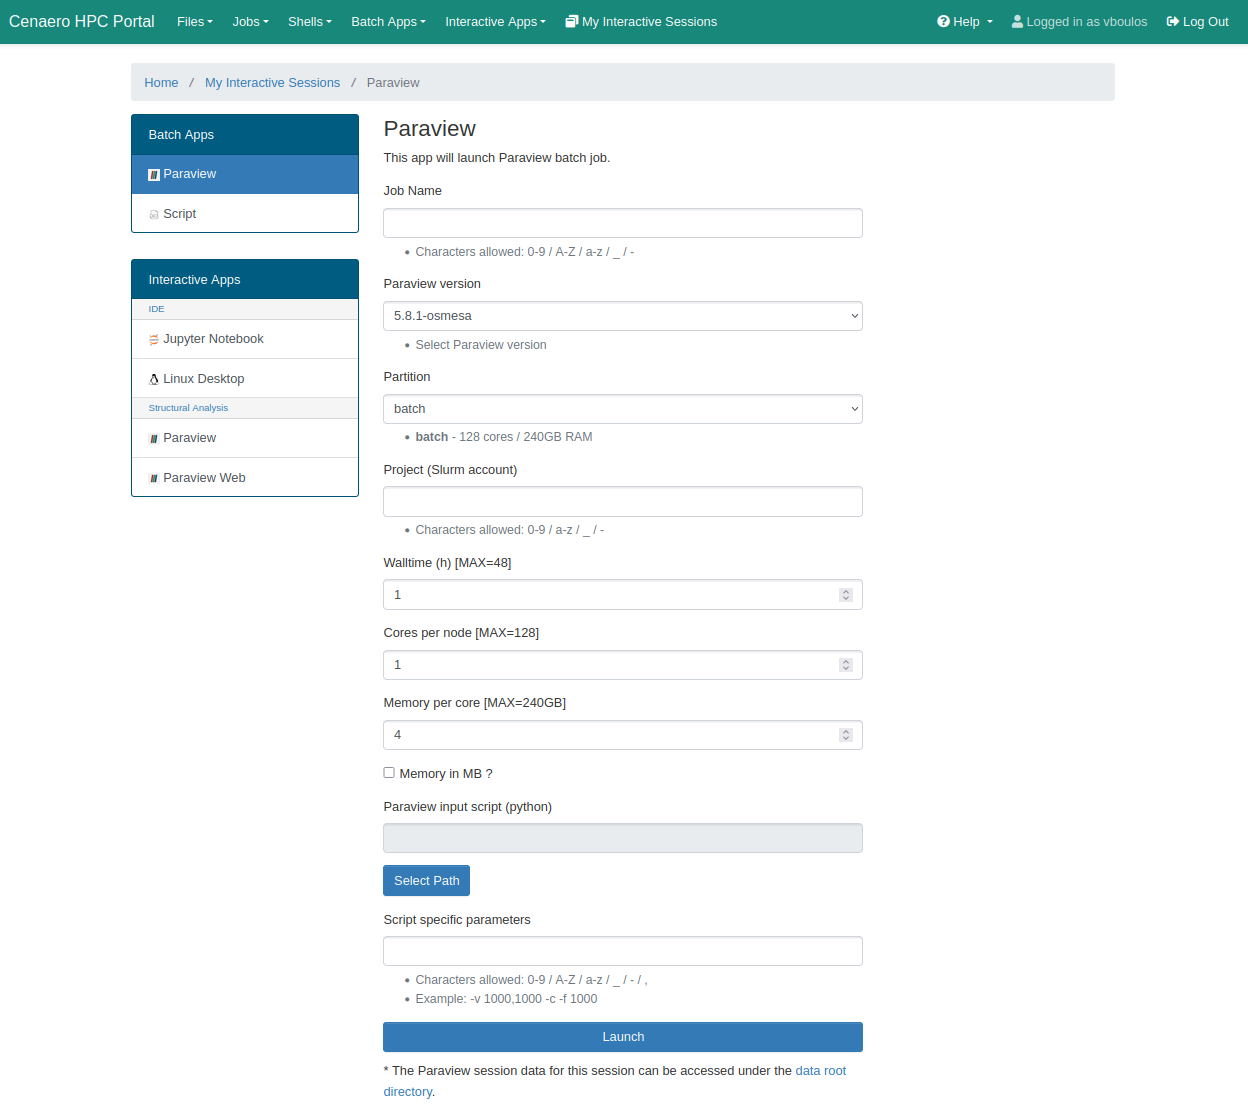
Click the Launch button at the bottom of the page to submit your batch job.
Paraview in GUI Interactive mode
ParaView supports distributed rendering across multiple GPUs. The application is configured to launch multiple pvserver instances, each utilizing a GPU through VirtualGL. Here’s how it works:
- The user selects the number of CPUs, which determines the number of pvserver instances to be launched in parallel.
- The user selects the number of GPUs they wish to allocate for the job.
- The runParaview bash script initiates all pvserver instances, distributing them in a round-robin manner across the selected GPUs.
Currently, ParaView jobs are restricted to the visu partition, where each job or session is limited to using only one GPU.
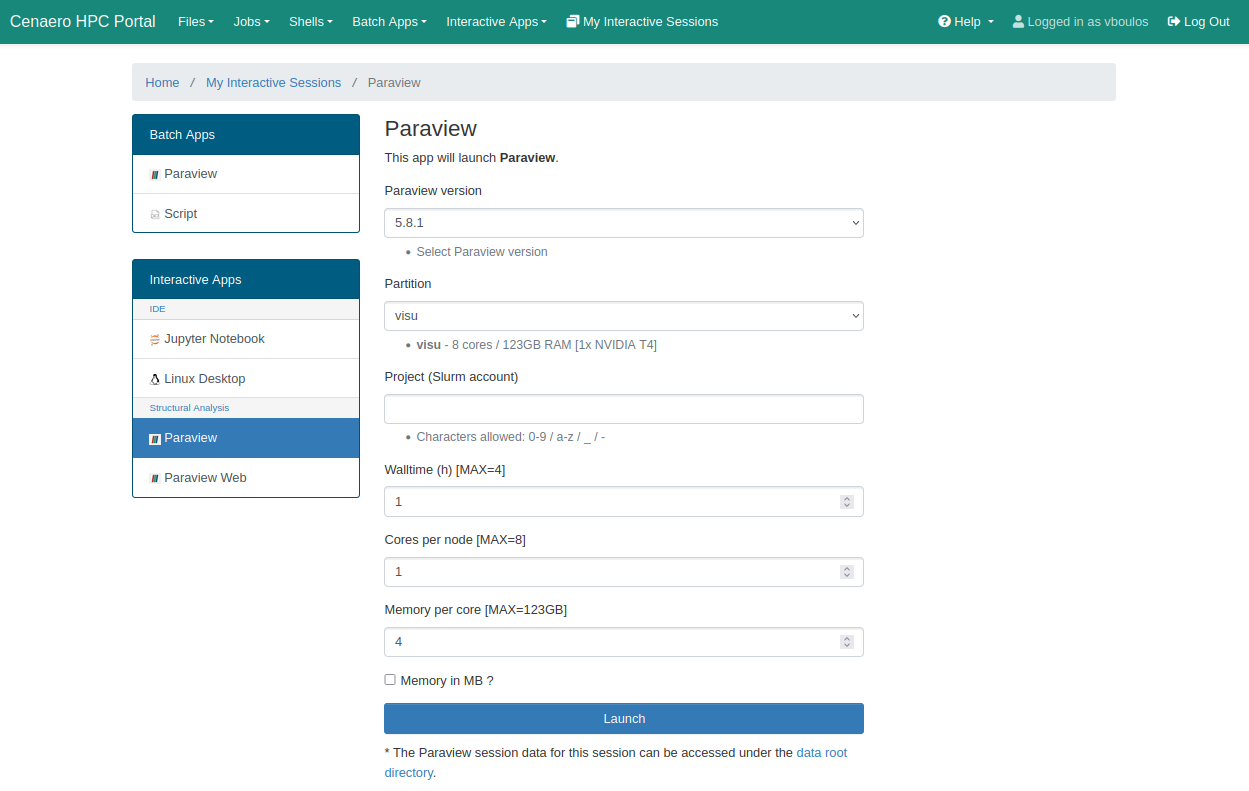
Click the Launch button at the bottom of the page to submit your resource allocation request.
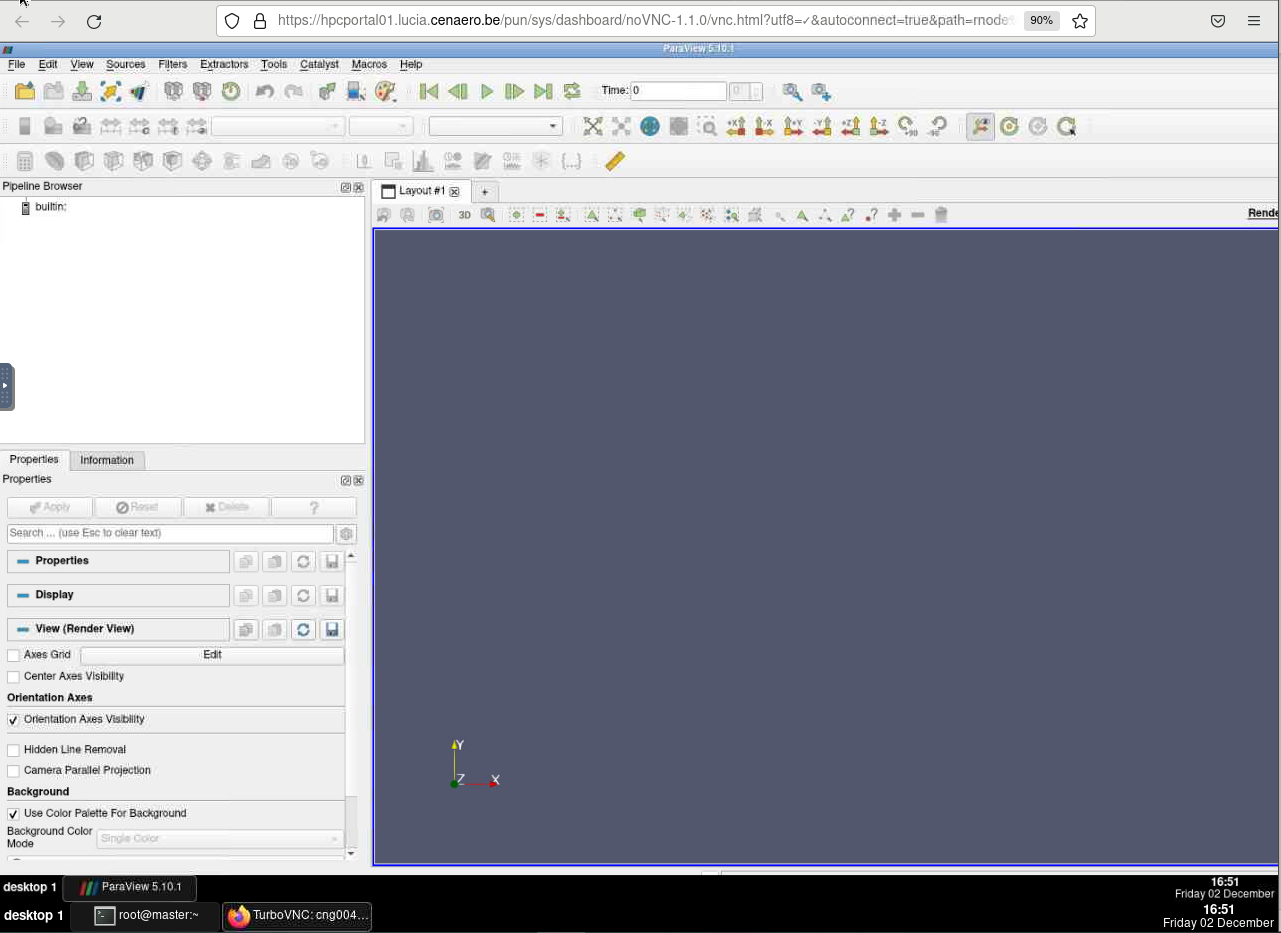
Don't forget to release the allocated resources when you are done.
Click the red Delete button to end the session and free up the allocated resources.
ParaviewWeb another Interactive mode
The ParaViewWeb service uses the runParaviewWeb bash script to start an HTML interface for the ParaView application, accessible through a web browser.
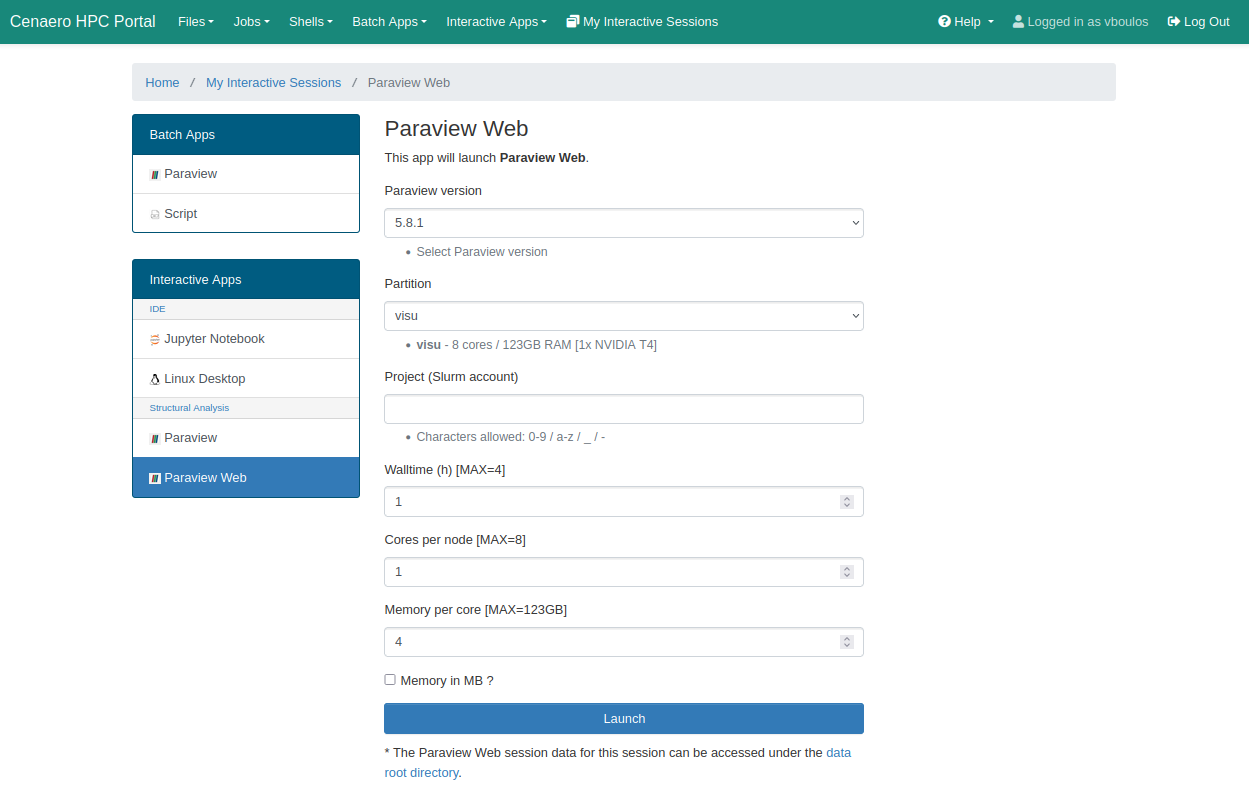
Click the Launch button at the bottom of the page to submit your resource allocation request.
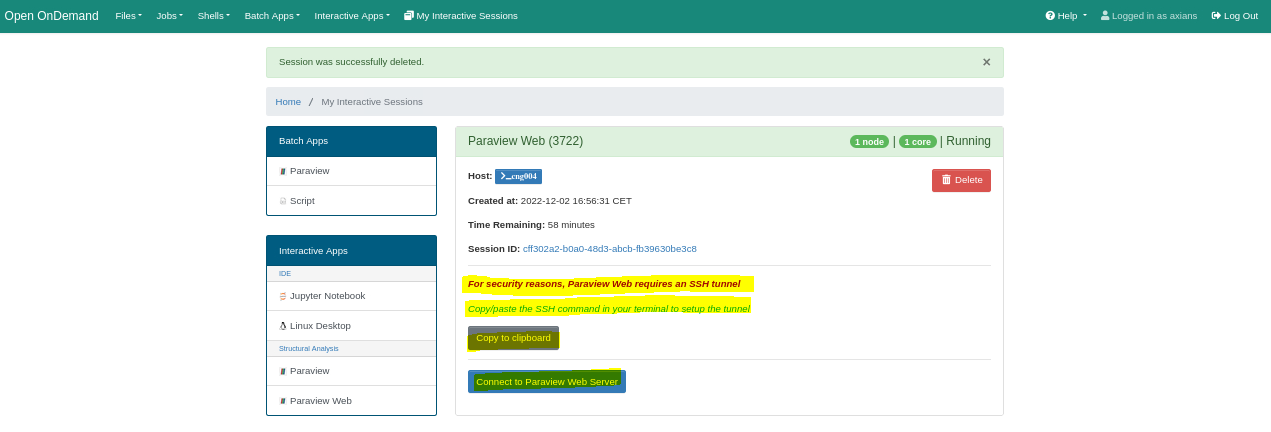
For security purposes, an SSH tunnel must be established to access the ParaViewWeb service from your local machine. Connection parameters can be obtained by clicking the Copy to clipboard button. Once copied, execute the command in your local terminal before connecting to the ParaViewWeb server.
Don't forget to release the allocated resources when you are done.
Click the red Delete button to end the session and free up the allocated resources.
Managing sessions
There are two types of sessions:
- Batch: These sessions end automatically when the script finishes executing. No action is required on your part.
- Interactive: You can view active sessions by selecting My Interactive Sessions from the top banner. For each active session, you have the option to connect to it or delete it to free up resources if it is no longer needed.
